5.6 脚手架
Scaffold就是一个大容器,里边包含了很多的其他容器,比如抽屉、悬浮按钮、bottombar、等等。
我们先看一下属性
Scaffold({
    Key key,
    this.appBar,
    this.body,
    this.floatingActionButton,
    this.floatingActionButtonLocation,
    this.floatingActionButtonAnimator,
    this.persistentFooterButtons,
    this.drawer,
    this.endDrawer,
    this.bottomNavigationBar,
    this.bottomSheet,
    this.backgroundColor,
    this.resizeToAvoidBottomPadding,
    this.resizeToAvoidBottomInset,
    this.primary = true,
    this.drawerDragStartBehavior = DragStartBehavior.start,
    this.extendBody = false,
    this.extendBodyBehindAppBar = false,
    this.drawerScrimColor,
    this.drawerEdgeDragWidth,
    this.drawerEnableOpenDragGesture = true,
    this.endDrawerEnableOpenDragGesture = true,
  })
appBar默认导航栏body页面的主体floatingActionButton、floatingActionButtonLocation、floatingActionButtonAnimator悬浮按钮和属性drawer抽屉endDrawer右侧抽屉bottomNavigationBar底部导航bottomSheet底部工具栏 位于导航上面backgroundColor背景颜色resizeToAvoidBottomPadding、resizeToAvoidBottomInset当Textfield编辑状态是否谈起页面。drawerEnableOpenDragGesture手势拖动打开抽屉
例子
class _ScaffoldRouteState extends State<BaseBars> {
  int _selectedIndex = 1;

  @override
  Widget build(BuildContext context) {
    return Scaffold(
      appBar: AppBar(
        //导航栏
        title: Text("脚手架 tabbar 底部导航"),
        actions: <Widget>[
          //导航栏右侧菜单
          IconButton(icon: Icon(Icons.share), onPressed: () {}),
        ],
      ),
      drawer: new Drawer(
        child: _drawer(),
      ), //抽屉
      bottomNavigationBar: _bottomNavigationBar(),
//      bottomSheet: _bottomNavigationBar(),
      floatingActionButton: FloatingActionButton(
          //悬浮按钮
          child: Icon(Icons.add),
          onPressed: _onAdd),
      resizeToAvoidBottomInset: true, //谈起键盘则页面上移
      primary: true, //是否展示在顶部东航栏高度,true占用高度,否则只是在状态栏
      body: Center(
        child: Column(
          mainAxisAlignment: MainAxisAlignment.center,
          children: <Widget>[_bd2(), Text('click times: $_count'), TextField()],
        ),
      ),
//      extendBody: true,
//      extendBodyBehindAppBar: true,
      drawerEdgeDragWidth: 20, //手势多动偏移量 默认20px
      drawerDragStartBehavior: DragStartBehavior.start,
      drawerEnableOpenDragGesture: true, //手势拖动打开抽屉
    );
  }

  BottomNavigationBar _bottomNavigationBar() {
    return BottomNavigationBar(
      // 底部导航
      items: <BottomNavigationBarItem>[
        BottomNavigationBarItem(icon: Icon(Icons.home), title: Text('Home')),
        BottomNavigationBarItem(
            icon: Icon(Icons.business), title: Text('Business')),
        BottomNavigationBarItem(
            icon: Icon(Icons.school), title: Text('School')),
      ],
      currentIndex: _selectedIndex,
      fixedColor: Colors.blue,
      onTap: _onItemTapped,
    );
  }

  int _count = 0;
  void _onItemTapped(int index) {
    setState(() {
      _selectedIndex = index;
    });
  }

  void _onAdd() {
    setState(() {
      _count++;
    });
  }

  Widget _bd2() {
    return OutlineButton.icon(
        onPressed: () {
          Navigator.pop(context);
        },
        icon: Icon(
          Icons.close,
          size: 25,
        ),
        label: Text('pop '));
  }

  Widget _drawer() {
    return Column(
      mainAxisAlignment: MainAxisAlignment.center,
      children: <Widget>[
        Text('点击我返回,左滑返回,点击遮罩返回'),
        _bd2(),
      ],
    );
  }
}
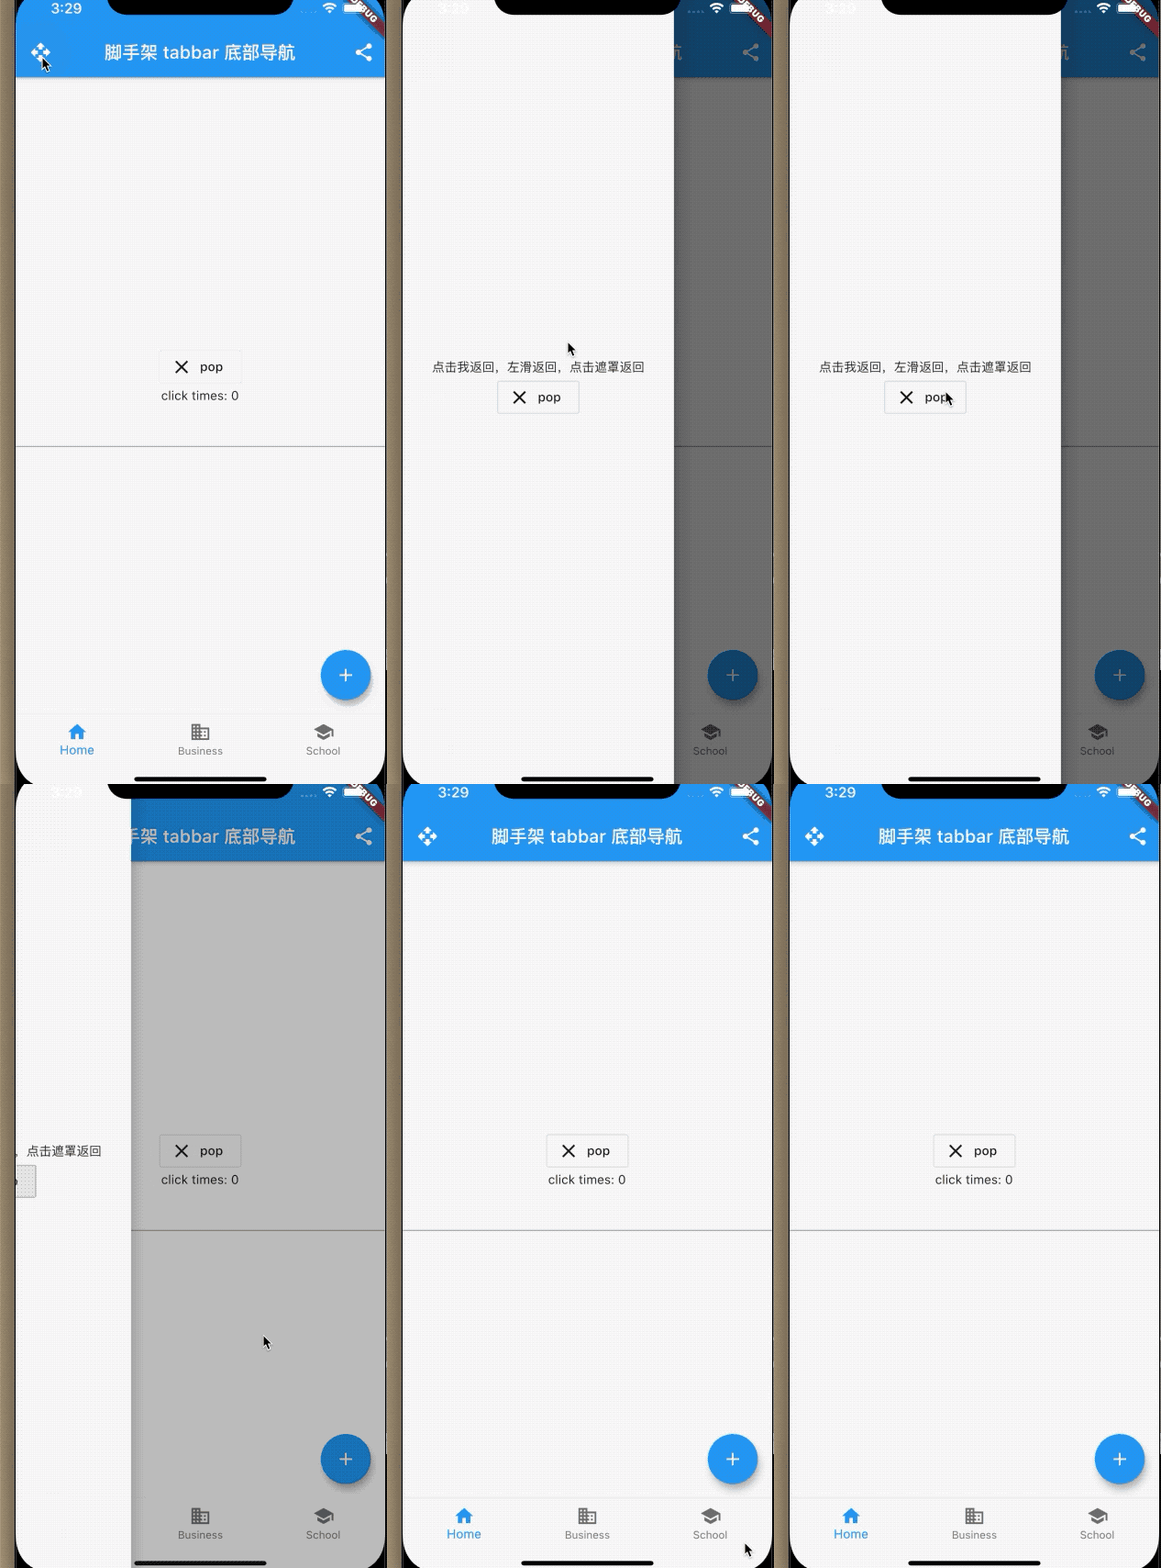
效果:

AppBar
AppBar是一个Material风格的导航栏,通过它可以设置导航栏标题、导航栏菜单、导航栏底部的Tab标题等,我们看下属性
 AppBar({
   ...
    this.leading,//导航左侧部件
    this.automaticallyImplyLeading = true,//是否默认自动实现leading 按钮
    this.title,//标题部件
    this.actions,//导航左侧菜单
    this.bottom,//底部导航菜单 一般用于Tab数组
    this.toolbarOpacity = 1.0,
    this.bottomOpacity = 1.0,
    ...
  })
自定义一个leading,打开抽屉:
Scaffold(
  key: _globalKey,
  appBar: AppBar(
    //导航栏
    title: Text("脚手架 tabbar 底部导航"),
    actions: <Widget>[
      //导航栏右侧菜单
      IconButton(icon: Icon(Icons.share), onPressed: () {}),
    ],
    leading: IconButton(
      onPressed: () {
        _globalKey.currentState.openDrawer();
      },
      icon: Icon(Icons.open_with),
    ),
  )
  }
看效果了

Tabbar
Material组件库中提供了一个TabBar组件,它可以快速生成Tab菜单.我们看一个例子;
  void initState() {
    _tabController = TabController(vsync: this, length: 3);
    super.initState();
  }

    @override
  Widget build(BuildContext context) {
    return Scaffold(
      key: _globalKey,
      appBar: AppBar(
        //导航栏
        title: Text("脚手架 tabbar 底部导航"),
        actions: <Widget>[
          //导航栏右侧菜单
          IconButton(icon: Icon(Icons.share), onPressed: () {}),
        ],
        bottom: TabBar(
          controller: _tabController,
          tabs: <Widget>[Text('今天'), Text('明天'), Text('后天')],
        ),
      ))
 }

使用TabBarView添加body 实现联动效果:
...
body: TabBarView(
        controller: _tabController,
        children: <Widget>[
          Container(
            alignment: Alignment.topCenter,
            child: Text('今天来了'),
          ),
          Container(
            alignment: Alignment.topCenter,
            child: Text('明天来了'),
          ),
          Container(
            alignment: Alignment.topCenter,
            child: Text('后天来了'),
          ),
        ],
      )
      ...
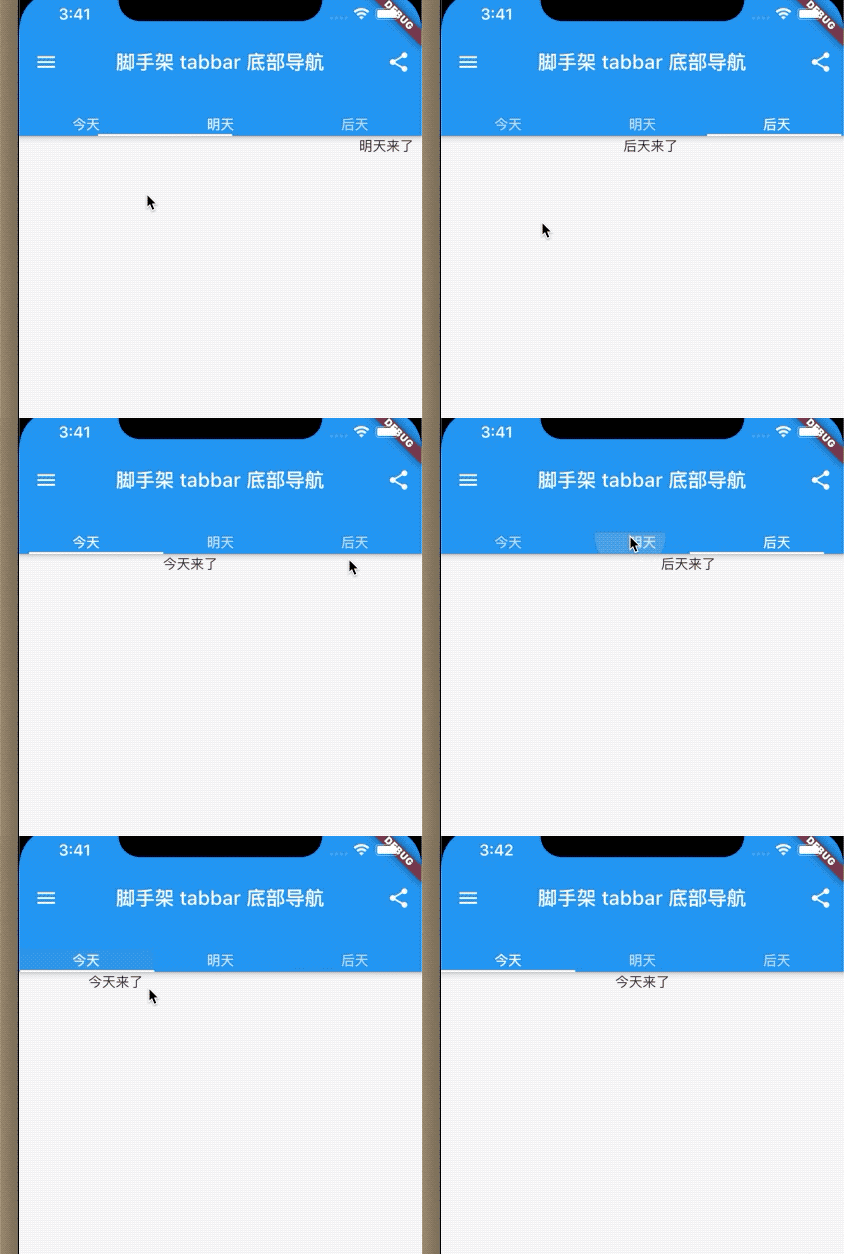
效果:

FloatingActionButton
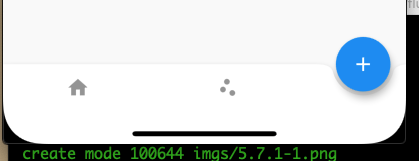
FloatingActionButton在底部,也可以嵌入到底部导航栏上。
bottomNavigationBar: BottomAppBar(
    color: Colors.white,
    shape: CircularNotchedRectangle(), // 底部导航栏打一个圆形的洞
    child: Row(
      children: [
        IconButton(icon: Icon(Icons.home)),
        SizedBox(), //中间位置空出
        IconButton(icon: Icon(Icons.scatter_plot)),
      ],
      mainAxisAlignment: MainAxisAlignment.spaceAround, //均分底部导航栏横向空间
    ),
  ),
  floatingActionButtonLocation: FloatingActionButtonLocation.centerDocked,
  floatingActionButton: FloatingActionButton(
      //悬浮按钮
      child: Icon(Icons.add),
      onPressed: _onAdd)

或者嵌入右侧
...
[
IconButton(icon: Icon(Icons.home)),
IconButton(icon: Icon(Icons.scatter_plot)),
SizedBox(),//右侧流出空隙
          ]
...

floatingActionButtonLocation: FloatingActionButtonLocation.endDocked,

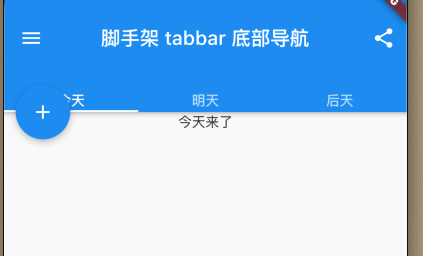
或者在顶部
...
[
IconButton(icon: Icon(Icons.home)),
IconButton(icon: Icon(Icons.scatter_plot)),

          ]
...

floatingActionButtonLocation: FloatingActionButtonLocation.miniStartTop,

CircularNotchedRectangle在底部打了一个洞,继承了NotchedShape,当然我们也可以自己定义一个形状。形状的位置是由floatingActionButtonLocation来确定的,
感兴趣的同学可以自己实现一个五角星的形状.